If you’ve ever wondered why user-level MDM for macOS feels clunky—or worse, completely irrelevant—in today’s Mac management world, the answer lies deep in the history of how macOS used to handle users, groups, and computers.
The Roots: Open Directory and MCX
Back in the day, macOS management revolved around Open Directory (OD). OD managed objects like users, groups, and computers, along with their apps and settings. The underlying engine for applying those settings was MCX (Managed Client for OS X). If you were around then, you probably remember Workgroup Manager—the GUI tool that made OD administration bearable. It was essentially the visual representation of this entire system.
Computer-level policy applied at startup and at regular intervals.
User-level policy applied at login.
Sound familiar? It should—because when Apple introduced MDM, they didn’t reinvent the wheel. They ported much of this logic from OD to MDM, keeping MCX as the underlying mechanism for applying settings.
From Line-of-Sight to Over-the-Air
OD was a line-of-sight system, similar to how Group Policy works for domain-joined Windows devices in Active Directory. MDM flipped that model on its head, moving to over-the-air management via an MDM server.
Profiles installed at the system level became the equivalent of computer objects in OD. Profiles installed at the user level mirrored user objects in OD.
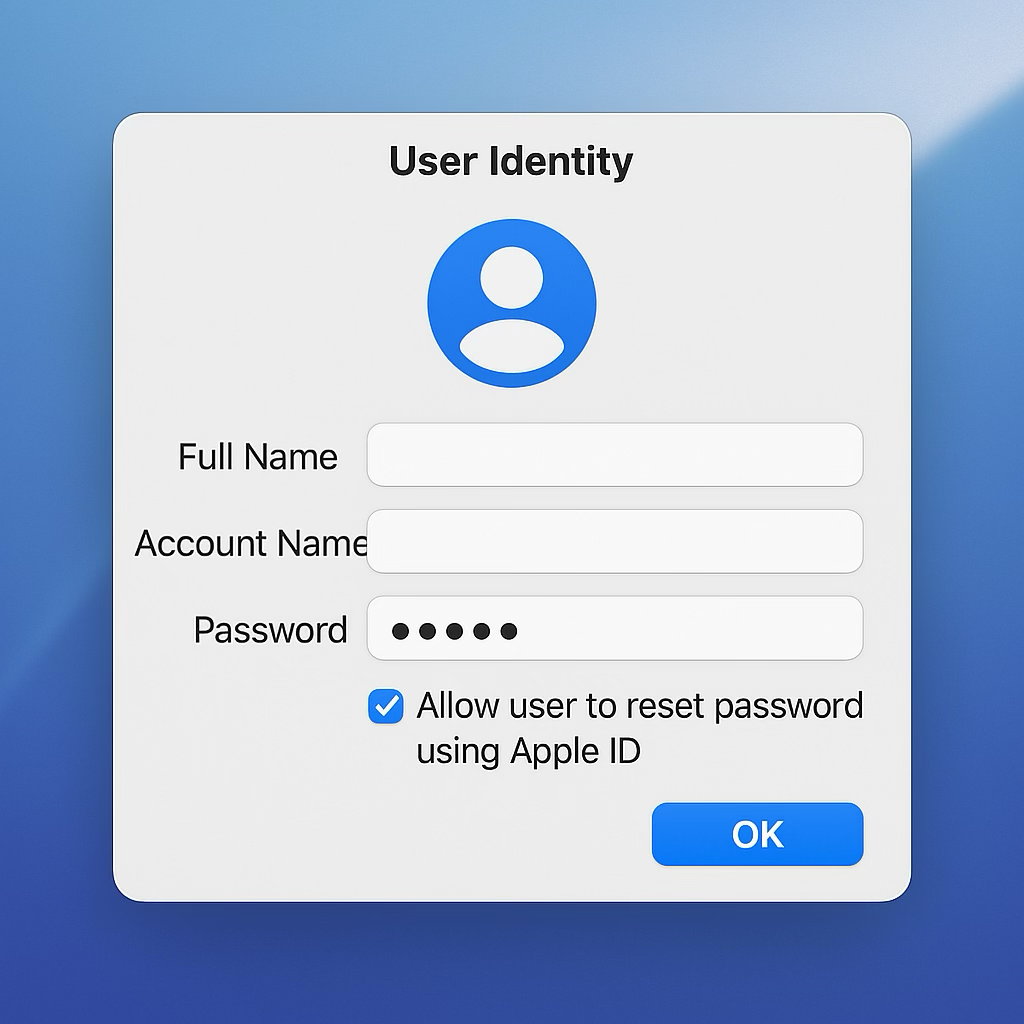
Here’s the catch: in Workgroup Manager, user objects only applied to OD/LDAP users logging in, not local accounts. When Apple brought this concept into MDM, they assumed a similar relationship—AD/OD/LDAP mobile accounts fetching user-level profiles from MDM, just like OD accounts fetching MCX.
The Bridge That Broke
To make this work for local accounts, Apple built a “bridge.” The idea was simple: tie user-level profiles to the primary local user account on an MDM-managed device. That link was established during enrollment—either by the logged-in user at the time or later via Automated Device Enrollment (ADE) designating the MDM-enabled user.
Fast-forward to today:
AD binding and mobile accounts? Dead.
Local accounts linked to cloud identity? The new normal.
And that’s where the wheels fall off. User-level MDM on macOS is rigid, confusing, and often more trouble than it’s worth. It’s a relic of a world that no longer exists.
Enter DDM: The Future
With Declarative Device Management (DDM) now taking center stage as “the way forward,” you’d expect it to resolve this issue right?
So far, it seems that DDM configurations which can be deployed in “User Scope” have the same challenge: needing a device management enabled user.
At this point, don’t expect Apple to give the artist formerly known as user-level MDM any love in the DDM world. That code is legacy, and to date, it’s staying that way.
What’s Next For Admins?
If you’re managing Macs heading into 2026, here’s what you should do instead of relying on user-level MDM on macOS:
Simplify Policy Design Instead of complex user-level policies, design device-based configurations that can apply to the system and all users on the device. For exceptions, consider app-level controls or conditional access.
Integrate Cloud Identity Use identity providers like Microsoft Entra, Okta, or Google Workspace for authentication and access control. See:
Leverage Declarative Device Management (DDM) Start testing DDM assets and configurations. It is the next destination for Apple device management and will eventually replace traditional MDM workflows. Use the same system and all user applied workflows so you’re not caught with a user that can’t get the correct settings.
Why Make This Post?
The reason user-level MDM has come up a lot in conversations for me as of late, is its USEFULNESS. Example:
“I want to deploy a unique configuration [like a certificate] to EACH user, when they login”
The Real Problem: user channel/scope management on a fully managed device is best suited for when multiple users can sign into a Mac. The way today we sign multiple users into a Mac doesn’t support user-channel MDM for EVERY user.
To understand its origin, is to understand its purpose, and better have empathy for why its doesnt do what you would expect.
Bottom line: Stop fighting Apple’s tech debt. Embrace system-level management (MDM and DDM) – it’s the sustainable future (for now 😉) of macOS device management.
A topic I seem to repeatedly discuss at present: what does modern identity look like on macOS?
More broadly, what does cloud managed identity look like on all endpoints for now and future?
Important context: At time of writing, macOS 26 has just been released, however, none of the new Platform Single Sign-On (PSSO) features are supported by Okta or Entra ID.
The goal of this post is to share opinionated principles of modern cloud driven identity on macOS and similar platforms, with examples of implementation detail that will change/evolve/mature/evolve over time.
I also acknowledge that Apple have changed their language from Mobile Device Management (MDM/MDM Server) to device management service to group platforms that use a mixture of old and new management protocols. I will use MDM interchangeably with device management service regardless if MDM (old) or DDM (Declarative Device Management aka new) protocols are involved.
Edit: credit to @trbridge, @hcodfrie, and @BigMacAdmin on Mac Admins Slack for pointing out some errors above.
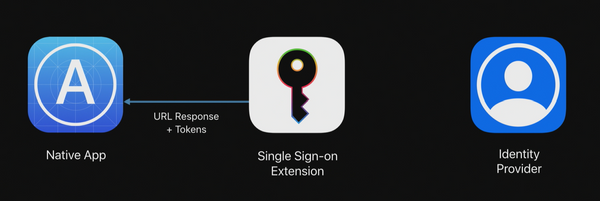
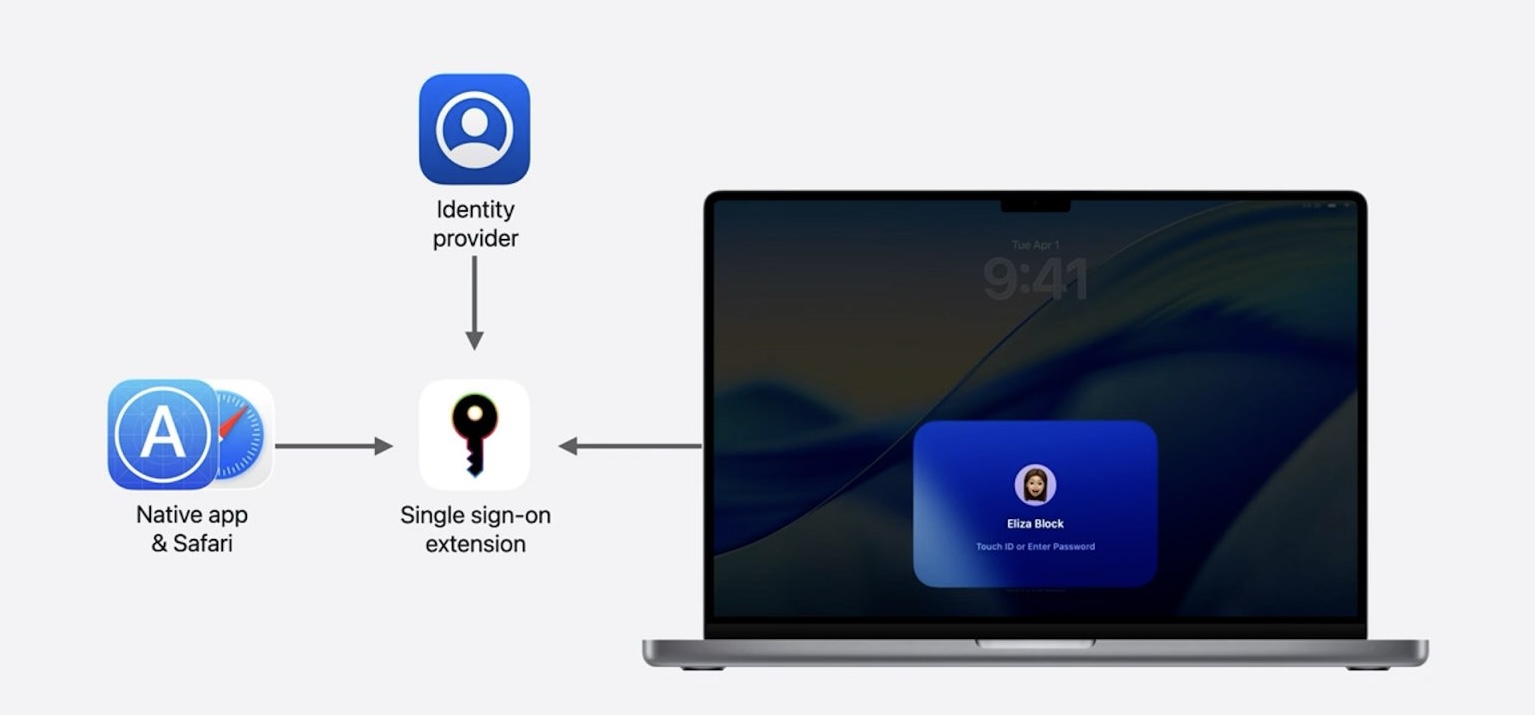
Where Identity Is Used
User Identity on macOS has 4 touch points to influence outcomes in this discussion:
Enrolment during Setup Assistant
MDM assignment for policy
macOS User account provisioning (login window)
macOS User Account SSO and password sync
Enrolment & Policy
Enrolment & policy are generally related to one another and driven by the MDM (though some MDM vendors can change the assigned identity on the fly even if initially set to something else at enrolment).
Account Provisioning
Enrolment can influence or control account provisioning as part of Apple’s device management protocols to set or force the user account (nuances per MDM tool implementation).
SSO & Password Sync
A one to one device should NOT password sync IMO. Treat local password on Mac like an iPhone passcode or Windows Hello PIN. A token dance with MFA/passkeys/etc for Single Sign-On (SSO) access to resources beyond the Mac is the security gate, not the Mac login window.
Device Personas
I strongly believe that with cloud identities driving modern management practices, your device identities should come in 2 “persona” based flavours:
One to one
Shared
One to one is seen as a personalised device used by a single staff member over a short or long period of time. It typically holds 1 primary user session/data volume and needs to be reset to be used by someone else.
Shared is seen as a device that can be used by multiple people through a given day or week, such as a room based computer, like a computer lab. It supports multiple user sessions/data volumes that people can rapidly log in and out of.
Through the lens of the 4 touch points, here is what I recommend for each persona:
One to one:
Authenticate at enrolment for the primary benefit of MDM policy based user assignment and optionally for Account Provisioning
Enrolment has assigned your user for user assigned configs like wifi certs
Enrolment can optionally prefill the local Mac user account short name with the prefix of the UPN or the user can create an account themselves. They set a local “passcode”.
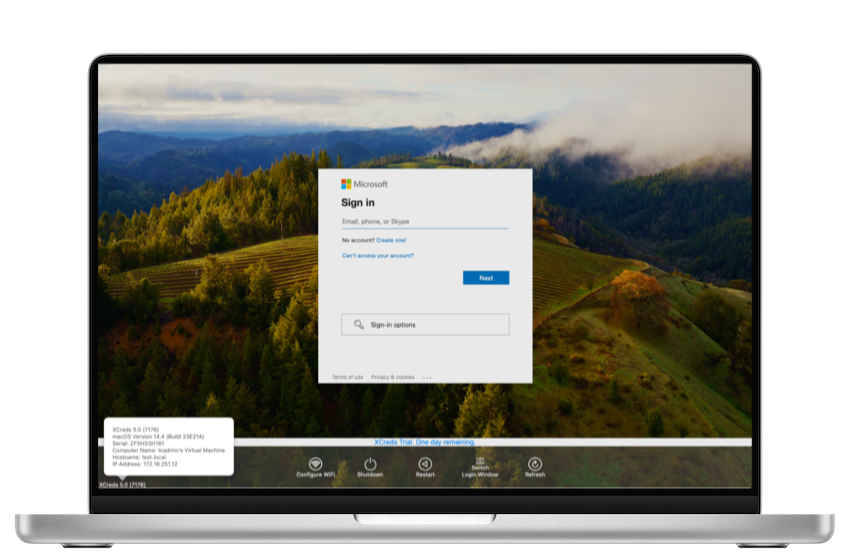
SSO for on premise resources uses the Kerberos SSO extension, XCreds, Jamf Connect, or similar. For cloud resources use the SSO extension with Company Portal or Okta Fastpass. No password sync. Only use PSSO if you need the benefits of a joined user assigned device object, possibility of Kerberos SSO and additional conditional access policy controls.
Shared Devices:
Depending on your security posture and threat models, don’t authenticate at enrolment, or authenticate in a tech driven workflow. Local admin account creation may be automated or need to be created in setup assistant.
User assignment is not required, but dynamic update is optional with capable MDM tooling
Use XCreds or Jamf Connect for cloud driven identity user provisioning/login. Don’t require MFA.
Use Kerberos SSO extension, XCreds, or Jamf Connect for password sync (cloud sync if available) and Kerberos Tickets. Use SSO extension with Company Portal or Okta Fastpass for cloud resource SSO.
Do not use PSSO TODAY for shared devices as the per user registration is buggy and a bad user experience IMO.
If the changes for PSSO in macOS 26 and associated implementation changes by IDPs turn out as expected, my recommendation likely changes.
From AD to Entra with Windows Hello
With or without PSSO, the guidance above works. It follows a similar line of thinking to WHfB (Windows Hello for Business) which already makes sense if you’re an Entra shop.
These concepts may be harder to swallow if you’re still very much an AD (Active Directory) shop.
If your organisation’s answer to autopilot device deployment for Windows was hybrid join instead of Entra join, you know who you are 😅
The one login to rule them all paradigm people were used to with AD joined devices makes sense for shared devices. It doesn’t make sense for personalised devices in 2025 IMO.
It has the “always on network” assumption.
It also assumes resource access control is pretty flat and not dynamic at all.
WHfB Components
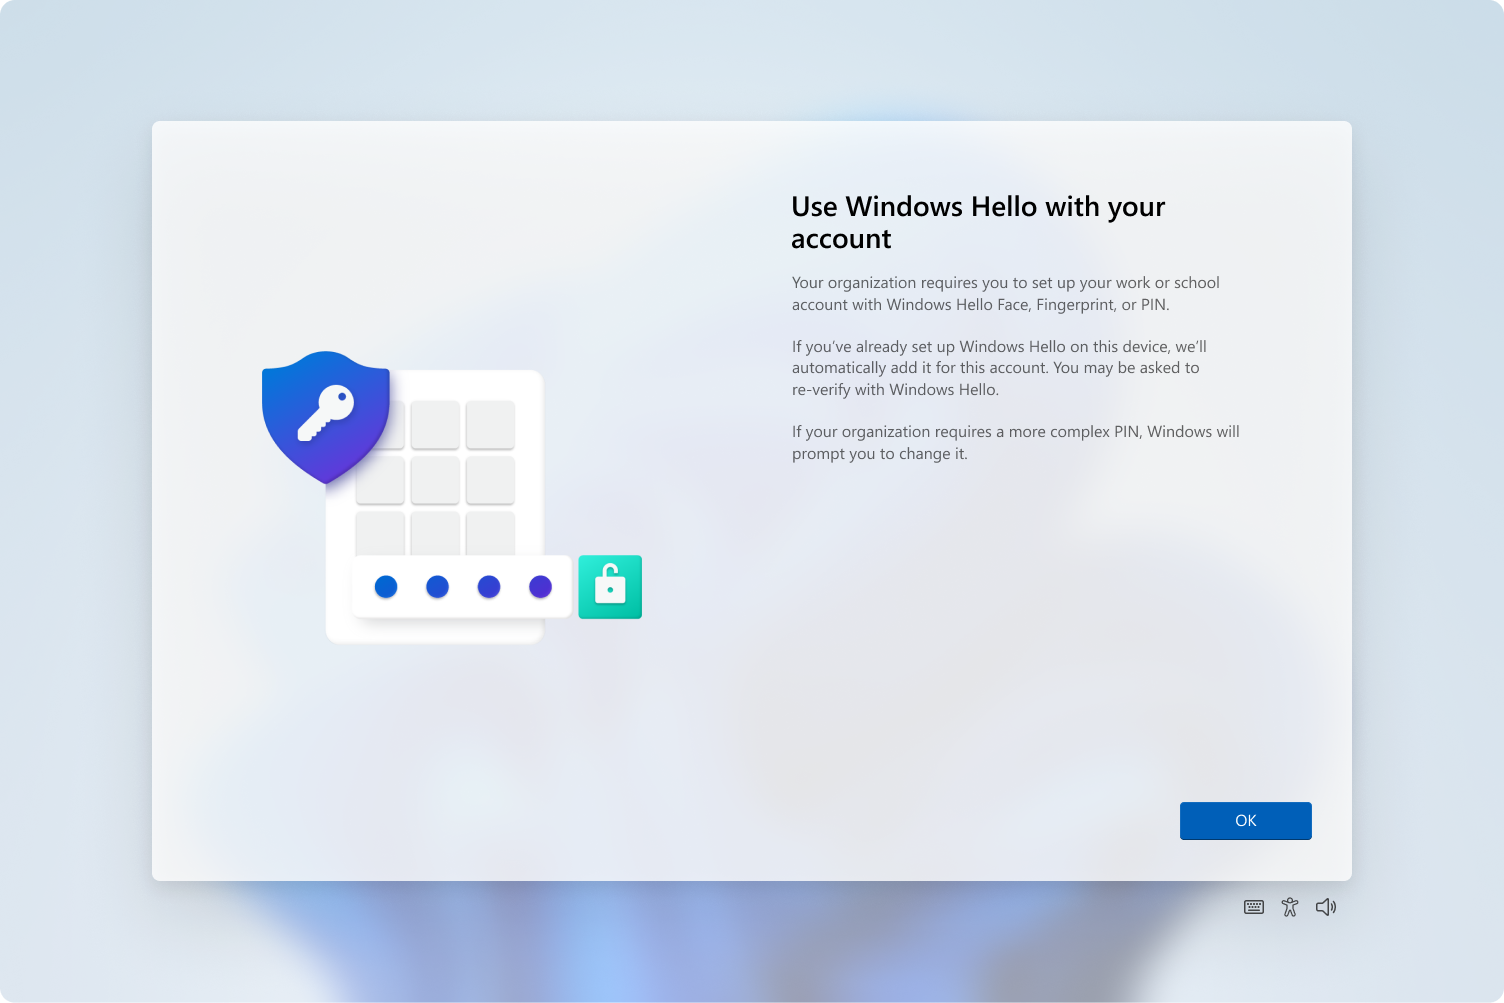
WHfB promotes the concept of:
Local Credential = PIN
Biometric = Face/Finger
Directory credential = dir user password
Directory trust/SSO = PRT granting
Let’s compare these to Apple device concepts:
iPhone/iPad (one to one):
Passcode
Face/Touch ID
Sign in to Outlook/SaaS apps
MS Authenticator w SSO extension inc MFA dance
Mac (one to one):
Local User Password
Touch ID
Sign in to Outlook/SaaS apps
Company Portal w SSO extension inc MFA dance
Shared Windows Devices
For shared devices, the model of Windows Entra Joined is:
Directory credential at login window (future state passwordless, using something you have like a passkey)
The FIRST sign in to a cloud app/Entra auth resource gets you to MFA dance to get your PRT and then SSO is your friend from there.
When To Enforce MFA
I see a lot of confusion around MFAs place when cloud identity is involved with macOS, Windows and other endpoints.
In the AD Bound device paradigm, you always logged in with the current (or cached) credential of your networked user account. Unless you had a fancy implementation from RSA, you probably didn’t worry about hardware tokens or other forms of multi factor authentication at the computer login screen.
That single login WAS your single sign on to all organisation resources connected to the Kerberos motorway, starting with the TGT (Ticket Granting Ticket) that gave you subsequent tickets for each file, print, or authenticated web server you tried to access.
In a cloud identity driven world, it’s your cloud authentication POST LOGIN WINDOW that grants your primary refresh token (PRT). That authentication flow is subject to conditional access policies, and the subsequent access tokens it generates are also subject to their own conditional policies.
That’s Not A Token! This Is A Token!
There is a widespread misconception that WHfB is how you enable or disable your MFA requirement for a cloud resource SSO experience with Windows login.
If you have conditional access policy that says you must MFA to get a PRT and/or access certain cloud resources (like OneDrive), it’s doesn’t matter if you’re logging in from a Entra Joined/managed device or not at all basic level.
What matters is that you perform MFA in USER SPACE to get a PRT and start granting access tokens.
WHfB makes MFA the first thing you do AFTER the windows login screen on an Entra Joined device. In order to get this benefit they REQUIRE you to set a PIN and/or Biometric authentication method.
Without it, you can sign into the PC with just a password, but you don’t have access to any cloud resources until that FIRST MFA to get a full PRT prompted by the first app sign in.
They both don’t require MFA to sign into, especially for a shared device, and only get you to confirm user presence and factors of trust when you’re accessing resources BEYOND the computer.
If you exclude the device/user/source IP from MFA the login window can SSO to apps like OneDrive, similar to the on prem AD sign in days if it suits your security/threat models.
Truthfully? Not a great idea 😅
Back To The Mac
Gee, that was a lot of Windows talk on a Mac blog: yes, yes it was.
The reality is we operate in a lot of technology environments set by standards derived from roots in Kerberos and LDAP, packaged into the Active rather than Open flavour of directory.
Microsoft embraced a while ago that the future was not the old ways, but identity founded on a different set of rules. You couldn’t confine to the network perimeter, but had to design identity systems that had infinite collaborators at a global scale.
This new set of rules says how we authenticate and prove our identity will need to become increasingly complex in its defence to threats, which meant the focus of protection needed to change.
We’re trying to prevent a threat actor from accessing unauthorised resources, not block a user from logging into their machine and recover from a legitimate problem.
If you authenticate and prove levels of trust to provision a computer and your user account, why do you need to prove that trust every time you hit the login window and every time your PRT needs to refresh?
Keep access to the device easy (just a password or local pin or biometric) and the sign in to your cloud resources via the PRT access tokens policed by your conditional access policy, managing the threats to your organisation’s most valued assets (your “Crown Jewels”).
Enrol/provision a Mac using known credential – with MFA
Login to a Mac with your local PIN/biometric (1:1) or known credential (shared) – no MFA
Get access to your PRT for SSO and re-auth with conditions are not met – with MFA
I hope this posts helps you and your organisation move forward with cloud managed identity for the modern endpoint.
In May 2024, I was assisting a school with setting up a new macOS deployment workflow.
They were previously an all-Windows school and were looking to pilot macOS devices.
Everything went smoothly except for one key issue:
The Mac couldn’t print.
More specifically, the Mac couldn’t print to their SMB printer queues shared/managed by Papercut.
Whilst the official recommendation from Papercut when experiencing SMB issues post PrintNightmare is to use LPD or Mobility Print (IPP/HTTP), sometimes you have to deal with the cards that are dealt 🙂
…when printing macOS > Windows over SMB… can result in printers going into a Waiting state indefinitely. You might initially see them go into a Hold for Authentication state - if you click refresh and supply valid credentials, you will end up in the Waiting state.
One of the suggestions in the above thread was to add ?encryption=no to the print queue, which on its own didn’t make any difference.
The baffling part of the issue was that printing WORKED in my initial testing but stopped when I was minting the workflow ready to handover to them.
So what had changed?
I had added a computer naming step to the workflow.
The script used to name the device resembled this:
Changing the computer name in System Settings/Preferences didn’t fix the issue.
Resetting the device, not using the script to name the computer: WORKED!
So why did setting the computer name break it?
If you pay close attention to the script above, macOS has three names:
ComputerName
HostName
LocalHostName
When you use the built-in directory binding plugin (via script or directory utility), the HostName is important to be set before binding as it forms part of the information used in the domain join.
The HostName can be different to the visible name of the computer in Terminal, System Settings, etc., which is why admins have been using scutil for a while to set all three in scripts.
The Jamf binary on a Jamf Pro managed Mac uses the same approach of setting all three names when you use it to set the computer name.
In a world that is ever increasingly free of AD-Bound Macs (to which we rejoice), setting all three computer names is less important and evidently troublesome when trying to print to SMB queues hosted on Windows Server.
Looking at logs, network traffic, and digging around the web, there is evidence that deep in macOS is code that looks for the HostName being set as evidence of an AD-Bound device.
As a result of this confused state of identity, it starts sending RPC signals that AD/Windows Server doesn’t know what to deal with, causing the communication to fail.
Computer: “Hey, I’m this AD-Bound device MAC123, can I print?”
Server: “MAC123 not found in my directory. Go away.”
End of print job attempt.
At the time of this discovery, naming the computer was not an important success criterion.
We skipped naming the device, configured the printer queue install (using a script similar to the one below), that included the ?encryption=no in the queue URI, tested successfully, and off we rode into the sunset.
I recently visited that same school and helped them revise their macOS deployment workflow. They wanted to expand the pilot to a new set of users and add in any latest tooling/config changes that were appropriate.
Printing came up again.
The papercut environment was largely unchanged, but the queues had stopped working.
After troubleshooting and dusting off old notes (and brain cells), I was able to conclude:
macOS 15.6+ has the same issues as previous versions (including macOS 14, where I had encountered the year prior).
Jamf Setup Manager, which I was now using to set the computer name and therefore using Jamf Pro’s Jamf Binary, was setting all three computer names, repeating the hostname/RPC issue.
Using a script to run scutil --set HostName “” and then rebooting the machine will fix the RPC authentication issue.
The ?encryption=no string now causes the print job to fail and needs to be removed from the printer queue path.
Using a script to only set the LocalHostName and ComputerName via scutil works fine (and is effectively the same as setting the computer name in System Settings).
So in summary:
Symptom: If you can’t print to an SMB printer queue hosted on a Windows Server and it gets stuck waiting or on hold for authentication (even though you’ve provided user auth credentials or have Kerberos tickets).
Check: run scutil --get HostName and see if you get a result.
Fix: if the HostName has been set, run scutil --set HostName “” and then reboot the Mac to fix the RPC authentication issue.
Hope you find this and it assists your obscure printing issue 😆
The tale of the macOS MDM Managed Local Administrator Account vs Jamf Management Account
Over the years as Jamf Pro and macOS have evolved, from pre-MDM framework, including the Casper Suite days, to the more recent evolutions of FileVault and SecureToken, Apple is investing more and more into “non-agent” frameworks to build on the Success of an MDM first approach in iOS.
Jamf Pro has been a fantastic tool for running policy and agent/binary based to fill in the gaps for where MDM framework initially didn’t existing, and then subsequent in its short comings.
The next low hanging fruit in both Apple and Jamf Pro’s evolution, around local macOS account management, is the macOS local administrator account.
Apple have recently clearly defined the future role of the “managed administrator account” that the MDM framework can remotely manage:
Jamf Pro currently has a partial implementation of the “managed administrator account” as part of macOS PreStage Enrollment, however there currently is no ongoing “stateful” management of the account.
Jamf Pro does currently have a process of managing the password of Jamf Pro Management Account found in User-Initiated Enrolment using the Jamf Pro binary via policies.
A recent release of Jamf Pro better separated the MDM created PreStage enrolment account and the Jamf Management Account, however, the Jamf Management Account framework is largely one of Technical Debt in the Jamf Pro Framework.
2 Possible pathways forward:
Migrate the Jamf Pro Management account out of policy/binary based management and assume the role of Apple’s “managed administrator account”. Some of the related Jamf Admin functions will need to be deprecated and some replaced by modern MDM features such as MDM enabled Apple Remote Desktop management
Build out the MDM commands/framework for ongoing management of Apple’s MDM “managed administrator account” and mark the Jamf Management Account as deprecated. This would also involve replacing the Jamf Management account under UIE with the MDM “managed administrator account” for consistency across “Device Enrolment” and “Automated Device Enrolment” intended for corporately owned devices. User enrolment channel being developed by Apple will not have any management account in scope.
Which ever pathway is chosen, the messaging to Jamf Pro administrators in the community will be to move the primary corporate admin account account on corporately owned shared and one to one macOS devices to the MDM MDM “managed administrator account” and have a place on the Jamf Inventory Record to manage the password of the account as part of MDM commands and/or inventory data.
Similar to the concept of FileVault PRK and IRKs, I envision Jamf Administrators having the ability choose a common password across all devices, configured in one place, opted in as a default option on all macOS devices, with alternate options for individually specified and individually auto generated (ie LAPS concept) passwords on each computer inventory record. Auto generated, unique per machine, as found as an option with the Jamf Management account currently, should be a global option for the MDM “managed administrator account”.
The direction from Apple is clear and the technical debt of the Jamf Management account is confusing for many Jamf Administrators.
Here is a Feature Request I created before I turned it into a blog post (upvote away!):
Another interesting discussion today on the MacAdmin’s slack revealed a workflow gap created for some schools when Apple deprecated Volume Purchasing (VPP) Redemption Codes.
Essentially, a really horrible process could be used to buy a bunch of licenses for an app, in the form of codes, and give them to end users to redeem.
It was superseded some time ago by Managed Distribution, championed by MDMs, to initially assign licenses to devices, “activated” against their Apple ID. This was later improved again by assigning directing to a device (no Apple ID required).
This evolution saw the decline of ye old redemption codes to the point that Apple chose to sunset it (for EDU only??) and focus on managed distribution. This has left a gap in workflow for some schools.
Some schools were using codes as a lightweight touch to tackle the ever popular adoption of bring your own device (BYOD), gifting apps to students to use on their personal devices (assume wrapping up in school fees). No need to enrol a BYO device into MDM.
With that option now gone, solidified by Apple forcing migration for the legacy volume purchasing portal to Apple School Manager in December 2019, schools are trying to figure out how to replace this workflow. Mass purchase of iTunes cards is being floated.
One option, which does involve MDM, is the new user enrolment MDM channel. I won’t go into detail here, but effectively iOS 13 and macOS 10.15 devices can enrol into your MDM using a managed Apple ID (from ASM) and get a quarantined slice of your device storage to install organisation content (if your MDM supports it). The MDM can’t even see your device serial number… making its new set of limitations a much more comfortable pill to swallow than “letting you install an app gives you access to erase my entire personal device” level of control.
The other option (which will be the most attractive to the redemption code loving crowd) is Apple Configurator 2.
This article points out a nice solution for “If you want to use managed distribution, but don’t have an MDM solution”:
https://support.apple.com/en-au/HT202995
Given you only need initial access to the device and then can revoke later as needed, this might be a nice solution.
To Add: https://support.apple.com/en-gb/guide/apple-configurator-2/cadbf9c811/mac
To Revoke: https://support.apple.com/en-gb/guide/apple-configurator-2/cadeaa4649f2/mac
Let’s see if this approach gets any traction with the BYOD wrangling EDU community.
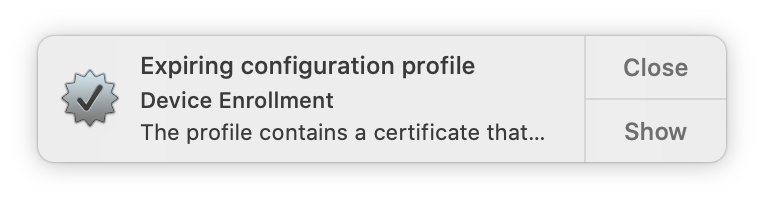
Update 2020-06-11: prior to May 30th I observed another symptom of this cert expiry that I didn’t comment on originally in this post. A client I recently worked with, who uses Aruba Clearpass to manage BYOD device onboarding to their managed WiFi SSID, were seeing this message across their user base.
The conclusion was the user context profiles installed manually by the user via the user driven onboarding process (which included the AddTrust root CA) were causing macOS to warn them around 30 days out and periodically after. Device level profiles including the same CA installed via Jamf Pro using SCEP did not alert the user. The CA was actually not in the current/relevant trust cain, but because it was managed via the profile, it alerted the user.
There have also been reports of on premise Jamf Pro environments having fallout by way of failed binary installs. When enrolling via either Automated Device Enrolment (DEP) or User-Initiated Enrolment the InstallApplication phase would likely deliver the initial package/commands to download the binary but the subsequent curl of binary components and binary enrolment will fail. This is most obviously identified by the MDM Profile and PPPC profile being installed but no other profiles and nothing under /usr/local/jamf (missing). The binary (& Self Service) were not present, causing the machine to fail enrolment and be present in the Jamf Pro web admin but marked as “unmanaged”.
TLDR; The AddTrust root CA expired May 30 2020 and now OpenSSL libraries used in tools like `curl` are struggling to recognise intermediate certs that are cross-signed to get around expiring root issues
Your Mac will trust the cert in Safari, but curl (used to download things in scripts) may not for example.
It appears that macOS transition to LibreSSL as early as macOS 10.13 for some components but the bits left effect this bug today. `nscurl` is Apple’s variant and the basis of other tools in macOS does not seem to be affected.
Bottom line: check your scripts…. it appears I may have some work to do.
As some of you may know, I am a big fan of ye old macOS management tool Munki. Though NOT an MDM, it is a powerful tool for managing macOS device apps and preferences and loved by the MacAdmins community. Please read through on the links above if you want to know more on those…
Anyway, for those who know what all of this wonderful stuff is and are curious on how AirWatch is using the beloved tool, read below:
Curiously, this is not a standard function to change which preference plist file it reads.
The “Munki_Repo” in the plist file above is a local folder which the binary reads as the Munki Repository (different to a tranditonal install where that would be pointing to a remote server)
The following traditional Munki Repo folders exist:
catalogs
icons
manifests
Traditional folders not present:
pkgs
pkgsinfo
A non traditional folder exists in the repo:
MunkiData
MunkiData contains a munki_data.plist which appears to be their way of knowing whats installed by them (AirWatch) and therefore knowing what to remove or not when a device un-enrolls from management. File contents:
The thing that stands out the most above is the PackageCompleteURL key used. Basically, the normal behaviour for items is to look in the Munki_Repo/pkgs folder for the asset but since the repo is local, they redirect to their storage for the actual package download. They do it via some local proxying method which is quite interesting…
In my example above I made the item on demand (rather than auto installed) and set a post install script to launch Chrome after it was installed (so I would know when it happened).
In a native munki world, you would be using the Managed Software Center GUI app to choose items that are “option installs” to install them on demand. In the AirWatch world, the back end system is making everything a managed install when it hits Munki, just holding it back until the user initiates it on an AirWatch portal as we’ll see shortly.
Its also worth noting that logs and other items are located in the “Managed Installs” folder as normal, except in the “/Library/Application Support/AirWatch/Data/Munki/Managed Installs/“ location rather than “/Library/Managed Installs/“
Walking Through Install Process
I used the “MyOrg Apps” Web shortcut the AirWatch Agent placed in my dock after it was installed and I was taken to a portal where I could browse or search for Apps that were assigned to me. On the front page was Chrome, so pressed to install and confirmed.
The AirWatch agent then started to do its work (shown. by the menu bar icon blinking) and after a minute or so Chrome launched as per my post install script.
My web based self service app portal now shows Chrome as “installed”
Comments On Preparation/Upload Process
The other interesting thing to note in my example is when I uploaded a DMG of the Google Chrome app into the AirWatch portal and assigned it, it asked me as part of the upload to download and install their “VMWare AirWatch Admin Assistant” on to my admin Mac to generate metadata.
The app basically asked for the DMG and less than a minute later spat out a folder in ~/Documents/VMware AirWatch Admin Assistant/ with an icon, DMG with modified name, and a plist containing the metadata the admin portal was after.
I would say in future it would be wise to run the assistant first and use the DMG it creates as I assume it makes sure the app in question is in the root level of the DMG as Munki prefers (different to the full path to place method Jamf uses for DMGs for example)
Final Thoughts
Overall, this is a simple but effective implementation of Munki leveraging the binary’s smarts but adding some integration with AirWatch systems to leverage the entire toolkit. It will be interesting to see how this aids AirWatch’s adoption for macOS management in the enterprise over the coming months/years.
After being at a recent Jamf course I was inspired to create a new project called JamfWATCH. As per GitHub:
Jamf Pro WATCH Dog: Monitor and self heal Jamf Pro enrolment if framework is removed from a client computer
Basically, at both reactive and recurring intervals this tool checks if it can communicate with the Jamf Pro Server its supposed to be managed by and if senses an issue tried to repair itself. Great for scenarios where end users may have admin rights and decide to do silly things like remove management from their computer.
I finally got around to organising a bunch of the scripts I have used over the last few years and put them into a more generic pool to be accessed and re-used.
The scripting/coding bug has got ahold of me over the last couple years, creating scripts and tools to improve functions for my work and my clients.
Over the last couple months, I started to put by big boy pants on and try doing things a bit more proper and start using GitHub to be track and publish my work.
I have a few in the pipeline at the moment, but certainly the 1st published and most polished is this: fmWATCH
fmWATCH is scripting for monitoring and resolving false mount points
A false mount “Watchdog”
Currently, it targets and addresses the empty mount points created in /Volumes by a bug in macOS 10.12 Sierra and above. When a network drive is already mounted, further attempts to mount via Finder’s Go > Connect To Server or persistent scripting causes the creation of the empty ditectories
To use/test, install the latest release at https://github.com/aarondavidpolley/fmWATCH/releases
Use at your own risk.
Note: the core script uses a non-destructive rmdir command that only removes empty directories in /Volumes, rather than an all destructive rm -rf style.
This is available under the MIT License: https://github.com/aarondavidpolley/fmWATCH/blob/master/LICENSE